Saturday, December 31, 2011

I am still here!

It has been a few weeks since I have posted a recipe....I haven't quit!
My family has been busy with a move!
Hopefully we can get settled in the next week and then I will share some recipes!
HAPPY NEW YEAR!!

Thursday, December 8, 2011

Guest Post...Chocolate Covered Pretzels

I am so excited to share with you a post from one of my friends. She is very talented and has so many creative ideas. After you read her post, go check out her blog at Green Eyed Girl Crafts and then you will be able to see for yourself how talented she is! Thanks Vicki for sharing your talents with us!
**********
Hello Kristi's Kitchen Kreations friends... my name is Vicki ~ aka The Green Eyed Girl ~ and I am NOT a cook in any way ~ shape or form...I can't make delicious meals and have them turn out beautiful like Kristi... but I dabble a little in treats and traditions. Pretzels because a tradition when Kendra became part of our little family it's not official yet... but maybe she will want to serve them at their wedding reception...lol). We've made them for Valentines, Clover Day, Easter, 4th of July, Halloween and now Christmas. We are still learning... but we are getting better each and every time we make them.  Thank you Kristi for asking me to guest post... it's a first for me... and it's been fun!
Bagged and ready for delivery...
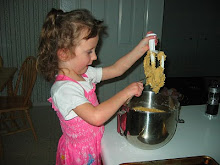
Warming the chocolate...
Note the jar Josh is pulling the pretzels from
Getting their chocolate coating...
Some had sprinkles...
Some had more chocolate...
The production line...
They were stacked everywhere...

In keeping with the Johnson family tradition of chocolate covered pretzels... we bought 2 of the big containers from Sams Club that had cute stars, trees and bell shapes (see top picture) for about $8.00 each plus about 8 pounds of white chocolate and in a matter of about 90 minutes we had over 1,200 of those bad boys completed and ready for delivery!

We are getting better with the "production" each and every time we make them. This time we decided to melt the chocolate (we bought 2 pound blocks instead of the chips) in the microwave first and then put the melted chocolate into the frying pan (it was on low) we found that this makes the chocolate stay warmer and the pretzel don't end up "swimming" in the chocolate because most of it will drip off and back into the pan... and we didn't have to keep re-heating the chocolate on the stove in the double boiler.  After they were dipped we put them on a waxed paper covered cookie sheet and moved over to the "decorating" section of the kitchen.

Our next big ah-ha moment was with the decorating bags. I had previously bought bottles (they looked like smaller ketchup bottles you use at a ballgame). Kendra would put several Wilton Candy Melts into the bottle and would microwave them until melted... stirring them constantly and sometimes they would burn a little because it was taking forever to get them to melt completely. This time I bought the Wilton Decorating Bags (I think there were 10 of them for $4.00)... these worked like a charm.  Kendra put several Candy Melts in the bag... zapped them for the time called for and then would "massage" the bag until all of the Melts were melted completely... then she snipped a very small piece off of the bottom and voila... the perfect decorating tool! (it's better to take just a little snip off ~ you can always snip off more if you want later).

Josh thought it was taking to long to just decorate each individual pretzel and decided they should just sweep across the whole tray with several passes back and forth with each of the colors. With this new idea they were much faster decorating than we were dipping and honestly... they looked just as good as when each one was done on its own!  Some of the pans Josh and Kendra used just the sugar sprinkles and others they did just the Candy Melts and on some they did both... they all looked so festive and tasted so good!

The pretzels would have set up a lot faster had my mom not cranked up the temperature to 86* in my house. Apparently when my mom and dad first arrived (Kendra and I were both running late at work and Josh was in the shower) my mom decided that it was a little "chilly" so she proceeded to crank up the heat to 86*... She claims she didn't hear the furnace kick on... so she just keep pressing the "up" button.  Josh was the one who noticed how hot it was getting and discovered that it was 86*. He first accused me of cranking it up and then my mom started laughing... she knew she was busted! Needless to say it gave us all a great laugh for the evening!

I hope that you and your family have at least one "fun" thing to do in the kitchen that everyone can do together... oh and don't forget to have your favorite Christmas carols playing in the background... you will be making memories for years to come!
Merry Christmas!
 

Tuesday, November 29, 2011

Swiss Chicken Casserole


  • 6 skinless, boneless chicken breast halves

  • 6 slices Swiss cheese

  • 1 (10.75 ounce) can condensed cream of chicken soup

  • 1/4 cup milk

  • 1 (8 ounce) package dry bread stuffing mix

  • 1/2 cup melted butter


    1. Preheat oven to 350 degrees F (175 degrees C). Lightly grease a 9x13 inch baking dish.
    2. Arrange chicken breasts in the baking dish. Place one slice of Swiss cheese on top of each chicken breast. Combine cream of chicken soup and milk in a medium bowl, and pour over chicken breasts. Sprinkle with stuffing mix. Pour melted butter over top, and cover with foil.
    3. Bake 50 minutes, or until chicken is no longer pink and juices run clear.
    *Jim's Mom has fixed this several times for us and I Love it, but I had never made it for my family. I love the combination of the swiss cheese with the stuffing mix.

    Thursday, November 24, 2011

    FEATURED ON....

    I have been traveling this last week and haven't had alot of time to do any blogging. So tonight I sat down, checked my new comments and guess what, I was FEATURED on another Food Blog!
    Thank You to NAPTIME CREATIONS for the Link Up!


    Nap-Time Creations

    Wednesday, November 16, 2011

    Helpful tip...Softening Butter

     I don't know about you, but I ALWAYS forget to pull my butter out of the fridge a few hours before I make cookies. If your butter is room temperature it makes a difference in the appearance of your cookies....for example, I have pulled butter out of the fridge to make cookies, needed it "room temp" right then, stuck it in the microwave for about 12 secs.  The melting process has already started with the butter once I do that and it causes a FLAT cookie!
    Notice the difference between these two pictures of cookies.
    The cookie with the microwave softened butter flattens out, and the edges turn brown and crispy.
    Room temp butter cookies hold their form a little better and cook more uniform.
    This has just been my own observation when I have made cookies. So, I thought I would share a helpful tip that I found for helping you soften your butter to room temp quicker!
    This idea was found HERE!
    Grate the amount you need! It will soften alot quicker! You will be making those COOKIES SOONER!

    Monday, November 14, 2011

    Pumpkin Creme Pie Cookies

    For Creme Pies:
    1 cup brown sugar
    1 cup white sugar
    1 cup vegetable oil
    1 can pumpkin (15 Oz.)
    2 eggs
    1 tsp vanilla
    3 cups four
    1 tsp baking soda
    1 tsp baking powder
    1 tbsp cinnamon
    1 tsp ground ginger
    ½ tsp salt
    ½ tsp ground nutmeg
    ¼ tsp ground cloves

    For filling:
    1 package cream cheese, softened (8 Oz.)
    1/2 cup unsalted butter, room temperature
    2 cups powder sugar
    3 drops vanilla
    2 dashes cinnamon
    
    Beat together brown sugar, sugar, oil and pumpkin.
    Add eggs one at time, mixing well after each addition, followed by the vanilla.
    Slowly incorporate the dry ingredients into the wet until just combined.
    Line a baking sheet with parchment paper.
    Using a pastry bag with a round tip, or a big zip top plastic bag with one corner snipped, squeeze out circles of batter, starting from the middle and working outward until the circles are about 2-inches in diameter.
    You can do larger than 2-inches or smaller as well.
    Bake in a 350 degree fahrenheit oven for 11 minutes.
    Cool on a wire rack.
    ------
    While the cookies are cooling, make your filling.
     Beat together cream cheese and butter.
    Add in powder sugar, vanilla and cinnamon.
    Mix til smooth.
    Frost flat side of one of the pies.
    Top with another cookie.

    **These are sooo SCRUMPTIOUS! I Love Cream Cheese and Pumpkin!
    **I found this recipe on Pinterest which took me to Claudia's Cookbook Blog! Thanks Claudia for sharing this fabulous recipe!

    Nap-Time Creations

    Saturday, November 12, 2011

    And the APRON goes to....

    THANK YOU  to all who entered the drawing!
    I really appreciate you following my blog.
    ****
    Congratulations to Comment #1!
    THE BUSEY FAMILY!
    ****
    I hope everyone has a wonderful Thanksgiving!

    Monday, November 7, 2011

    Salted Caramel Pretzel Chocolate Chip Cookie


    3/4 cup unsalted butter, softened
    3/4 cup brown sugar
    1/4 cup granulated sugar
    1 egg
    2 tsp. vanilla
    2 cups all purpose flour
    2 tsp. cornstarch
    1 tsp. baking soda
    1/2 tsp. salt
    1 cup milk chocolate chips
    1 cup caramel bits
    1/2 cup crushed pretzels

    Preheat oven to 350 degrees. Cream together butter and sugars until fluffy and light in color. Add egg and vanilla and blend in. Mix in flour, cornstarch, baking soda and salt. Stir in chocolate chips, caramel bits and crushed pretzels. Drop dough on a prepared cookie sheet. Sprinkle with Salt. Bake for 8-10 minutes, until barely golden brown around the edges. Let cool on the cookie sheet for 5 minutes then remove from sheet to a cooling rack and let cool completely.

    **This recipe came from a friend. She had made these cookies one day and let me sample them while I was at her house. They had a yummy, chewy, soft, crunchy texture all in one with a sweet and salty flavor mixed with the chocolate and caramel. I told her how much I liked her cookie and not many days later she brought me over a FULL plate of these cookies! Yes, I did share some of them! My friend was willing to share the recipe with me, so I am sharing it with you! Try them and let me know what you think! Thanks Alison for the YUMMY COOKIES!

    Friday, November 4, 2011

    Fall GiveAway!

    ***GIVEAWAY CLOSED***
    My very talented friend over at Our Cozy Nest shared a fun tutorial for this cute apron. So, I decided to make one and Give it Away to one of my Followers!


     I Love how the pumpkin turned out! And I Love the Fall colors!
    I am going to do the contest a little different this time. So, here is how you can enter to WIN the APRON:

    #1 You have to be a Follower.
    Click the Follow Button in the right column, sign in to follow, then leave me a comment telling me you are a follower.
    #2 Share my Blog with your friends! Have your friends Comment telling me that you shared my blog with them. They need to leave your name in the comment.
    For every friend that mentions your name, that's how many times you will be entered into the GiveAway!

    Good Luck!
    This Giveaway will end on Friday, Nov. 11th at 12:00 PM.

    Thursday, November 3, 2011

    Beef Roast with Marinade


    1 med size beef roast (3-4 lbs)

    Marinade for Beef Roast
    1/3 cup red wine vinegar
    1/4 cup balsamic vinegar
    1/4 cup worcestershire sauce
    2 TBS soy sauce
    2 cloves of garlic pressed
    1/2 tsp tobasco sauce
    1/2 cup olive oil

    Combine all ingredients for Marinade in a gallon size ziploc bag. Mix marinade well.  Add beef roast to marinade then shake the bag, coating the roast. You can also massage the roast with the marinade. Refrigerate the marinating meat for 12-24 hours turning the bag/meat a few times during this time.

    When ready to cook, take meat out of the bag and place it in a crockpot. Cook on low in the crockpot for 4-6 hours. Test meat with a meat thermometer to make sure it is cooked to the tempurature you desire.

    **This recipe came from Byron's Dutch Oven Recipes. Yes, it can be done in a dutch oven too. If you are a Dutch Oven Lover and want some Yummy Recipe for the Dutch Oven, Check out Byron's Recipes!

    **This roast had a ton of flavor. I thought it was kinda like a teriyaki flavor. A little different than your traditional roast, but still very yummy and savory!

    Tuesday, November 1, 2011

    Thank You!

    I just have to say THANKS!
    Thanks for Following me/my blog. Thanks for sharing the recipes with others! Hearing your comments and seeing you share the recipes really lifts my spirits. Thank You! It's because of your comments that I keep doing this blog. You are all AWESOME Followers!

    Friday, October 28, 2011

    Halloween Sugar Cookies

    
    Sugar Cookie
    2 cups sugar
    1 cup sour cream
    1 c butter
    2 eggs
    1 tsp. soda
    1 tsp baking powder
    1 tsp vanilla
    4 1/2 cups to 5 cups flour (for soft dough)
    nutmeg (if desired)

    Cream together sugar, sourcream, butter, and eggs. Add soda, baking powder, vanilla and flour. Add nutmeg if desired. Roll on slightly floured surface. Cut into desired shapes. Bake at 350 degrees for 10-12 minutes or until slightly browned.

    Cookie Recipe came from a CD of recipes Jim got for me a long time ago. The Sour Cream helps keep the cookies soft for several days.

    Powder Sugar Frosting
    4 cups powder sugar
    1/2 cup shortening or butter
    5 tablespoons milk
    1 teaspoon vanilla extract
    food coloring

    In a large bowl, cream together the powder sugar and shortening (or butter) until smooth. Gradually mix in the milk and vanilla with an electric mixer until smooth and stiff, about 5 minutes. Color with food coloring if desired.

    The frosting recipe came from Allrecipes.com. I put the alternate use of butter because that's what I use when I make it. If frosting is too thin add more powder sugar. If too thick add more milk a few drops at a time.


    Wednesday, October 26, 2011

    Halloween Birthday Cake


    Thursday, October 20, 2011

    Mimi's Corn Chowder

    I found this recipe HERE!
    3 slices of crispy cooked bacon, crumbled
    1/4 cup onion, diced
    2 cups creamed corn
    1 cup chicken broth
    1 pint light cream**
    6 saltine crackers, crushed
    1 cup shredded cheddar cheese
    16 oz pkg frozen diced potatoes
    salt and pepper to taste

    Mix all ingredients together in a slow cooker. Cover and cook on LOW for 3-4 hours or until potatoes are tender. Serve with your favorite soup crackers!

    *Recently I went to Mimi's Restaurant and had their Corn Chowder! I love cream soups...especially Corn Chowder because no one really make Corn Chowder any more. Anyway, as I was doing my "Blog Surfing" the other morning I accidentally found this recipe for Mimi's Corn Chowder! I was so excited so I of course had to try it! It was really yummy! So glad I doubled the recipe so we could have left overs!

    **Ok, because I am cheap and won't pay almost $4.00 for 1 pint of cream, I decided to pay just over $3.00 for a gallon of whole milk and used that instead of the cream. After letting the soup cook for 3 hours, it wasn't thickening like I wanted it to (because I added milk instead of cream). So I created a Rue with 1/4 cup melted butter and a 1/3 cup flour (for a double batch). Then drained some of the milky part of the soup off the soup, added it to the rue, mixing it till all the lumps are gone. Add enough of the milky part of the soup to the rue until it is pourable, but still thick. Pour the Rue mixture into the crock of soup. Give it a stir and let it cook that last hour. 

    Monday, October 17, 2011

    Do You LOVE Accessories?!

    I just have to share this FABULOUS opportunity!
    Are you looking for a little extra income...or maybe even more than a little extra?
    Do you LOVE ACCESSORIES?

    A few months ago a girl I grew up with posted some pictures on FB of some jewelry. I browsed through the pictures and thought, "Wow, I LIKE this stuff!" Then I saw how much it was....$5! No LIE! $5!
    My friend had just become an independent consultant for Paparazzi. Without even seeing the Jewelry first hand, I got really excited about what she was doing and thought, "I could do this too!" I checked into the terms and conditions of becoming a consultant and then became even more excited. Here are the things that first intrigued me about becoming a Paparazzi Consultant:
    *Extra Income
    *I carry and own my Inventroy
    *The Jewelry and Accessories are very Stylish
    *It's only $5!!!
    *It sells itself...No demonstrations/speeches
    *I can sell when I want, as much as I want
    ------------------------
    So, I signed up and since then have learned so many more fabulous things about Paparazzi!
    *Paparazzi just started having independent consultants in the last year. There is so much room for growth in the company!
    *I, as a consultant have a downline. Which means more money making opportunity!
    *There is a fabulous group of Consultants on FB that are all willing to help each other. We ask questions and answer others questions. Such a great resource for those just getting started and for those that have been doing it for awhile that need new ideas!
    *And this stuff SERIOUSLY SELLS ITSELF! I have done two home shows (1 1/2 hours each) and I have profited just over $200 on each! I sat up a display in my front yard the other day for 45 minutes...without any advertising I took in $70! I now have people just stopping by to see what I have!

    Ok, OK!! I will show you a sampling of what there is!
    Necklaces!


     Earrings!

     Braceletes!

     There are also hairclips, headbands, and rings along with some children's jewelry. To see more pictures go to My facebook PAGE...Paparazzi Jewelry By Kristi.
    Independent Consultant #1347


    Thursday, October 13, 2011

    Candy Corn Rice Crispy Treat

    I am so excited with how these turned out! Once I decided what to do, they were easy and were made with in 30 minutes or less!
    *******************
    1 bag (about 2 cups) white chocolate chips.
    orange and yellow sprinkles
    1 batch of rice crispie treats
             -1 bag regular size marshmallows
             -1/4 cup butter/margarine
             -8 1/2 cups rice crispy cereal
                   Melt butter in large microwave safe bowl for 30-45 secs. Add Marshmallows to butter and stir to coat marshmallows with butter. Place Marshmallows back in microwave on high for 1 1/2 minutes. Take out, stir marshmallows till smooth. Add rice crispy cereal to marshmallows mix til all cereal is incorporated. Press into a well buttered 9x13 pan. (I sprayed my pan with cooking spray and it worked great!) Let cool.

    After making the rice crispy treats I cut them into a triangle. (Cut rice crispies into squares then cut each square diagonally). Shape them into a candy corn. Melt chocolate according to directions on package. Pour some onto a small plate. Dip the top of the rice crispy into the chocolate....coating it well. Then add your sprinkles in the section you want to. I started with the yellow then did the orange. Do your sprinkles before the chocolate sets up then place on wax paper and let the chocolate set up. And VOILA! You have a yummy, fun, and easy treat to take to your kids class!

    **I didn't have any yellow sprinkles so I made my own! It was SO easy. I poured about 1/8-1/4 cup of regular sugar into a bowl. Dropped 3 drops of yellow food coloring in and stirred till all the sugar was yellow. It worked perfect! I will definitely be using this trick again!


    SASSY SITES!

    Tuesday, October 11, 2011

    Breaded Pork Chops


    6 pork chops
    2 eggs
    1/2 cup milk
    1-2 cups Dried Bread Crumbs

    Combine eggs and milk, whisking very well, creating an egg wash. Pour some bread crumbs onto a plate. Completely dip pork chop into egg wash. Then remove from egg wash and coat it in bread crumbs. Then dip in egg wash again and then bread crumbs again making sure it is completely covered in bread crumbs. Fry in a hot skillet (use a couple TBLS of oil/margarine to fry with) for 2 minutes on each side. You want the outside edges to be golden brown, but you are not cooking it all the way through. Place browned pork chops in a baking dish and bake at 350 degrees for 30-40 minutes. My pork chops are usually 1" thick. If yours are thicker you may want to cook them longer. Just make sure there is no pink in the middle.

    **This was the first recipe that I remember making for Jim when we were first married....that didn't come from one of our Mom's. And it was so Yummy! I remember being so excited that I created something that was sooo good!

    **I like to buy the big Pork Loins from Costco and divide them up into a couple roasts and several pork chops. There are even cutting directions on the package if you want to try to do this. It saves money! I think I pay around $20 for the Pork Loin and can get 2 roasts and 12 pork chops out of it. Enough for 4 dinners plus there are usually left overs from the roast to make into BBQ Pork Sandwiches for another dinner!

    Halloween Table Topper

    I bought this fabric a year ago and finally made my table topper!


    Monday, October 3, 2011

    Cheesy Garlic Twists

    Pizza Crust Dough
    Garlic Butter
         (1/4-1/2 cup butter or margarine softened. Stir in 1/4 tsp garlic powder.) 
    1-2 cups Mozzarella Cheese
    Italian Seasoning

    On a lightly floured surface, roll dough out in a rectangle shape.  Spread Garlic Butter over dough. Top with Mozzarella Cheese. Starting with long edge of dough, roll dough up like you would when you make cinnamon rolls. Slice rolls off end (about 1 1/2" thick). To make into stick/twist, grab a hold of opposite sides of the roll (not the edges that have been cut) and genlty pull to stretch it. When it's long enough to put a twist in it, then twist it once and place on a greased baking sheet. Sprinkle lightly with some Italian Seasoning. Let rise till almost doubled in size. Bake at 350 degrees for 20 minutes or until golden brown. Serve with warmed pizza sauce. 

    *These are so yummy! And easy! A big hit with the kiddos too!

    Related Posts Plugin for WordPress, Blogger...

    Top 5 Most Viewed